Pada saat ini google cloud memberikan percobaan gratis selama 1 tahun.
Perlu sobat ketahui, harga produk Google Cloud ini sebesar $300 atau setara dengan Rp. 4.347.900,- [kurs 14.493,-]. Lumayan kan sob…
Kenapa harus punya VPS Windows ?
Sebenarnya gak harus punya sih… hanya saja VPS Windows ini banyak digunakan oleh pemain blog wallpaper dan semi wallpaper. Dengan bantuan VPS Windows yang terkoneksi dengan Remote Desktop [RDP], mereka bisa membuat ribuan konten dalam 1 malam.Jadi yang harus punya VPS Windows itu pemain blog wallpaper.
Beberapa fungsi VPS Windows
- Server Backup [Backup Data ke dalam VPS Windows FTP Server]
- Remote Desktop [dengan bantuan Windows Remote Desktop]
- Database [MS SQL atau SQL Server]
- Active Directory [sarana untuk melakukan admnistrasi jaringan]
- Membuat Hosting [install ASP.NET atau IIS Web Server]
Panduan Membuat VPS Windows di Google Cloud
#Tahap Pertama : Pendaftaran- Daftar dulu di https://cloud.google.com/
- Pilih Try free
- Login dengan email sobat
- Pilih "Yes" semua dan klik Agree and Continue
- Isi form Customer info [jika sudah pernah setting info, form akan terisi otomatis]
- Isi Payment method [gunakan Credit Card, Jenius atau VCN BNI], kalau saya menggunakan VCN BNI
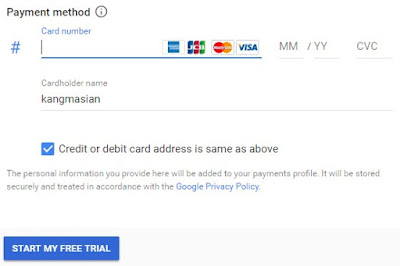
- Terakhir klik Start My Free Trial
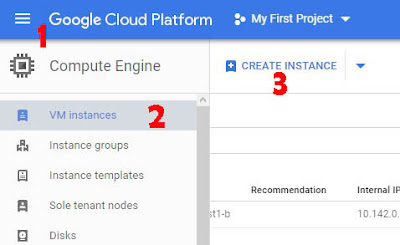
- Pada Menu Google Cloud Platform Pilih Compute Engine
- Klik VM instances
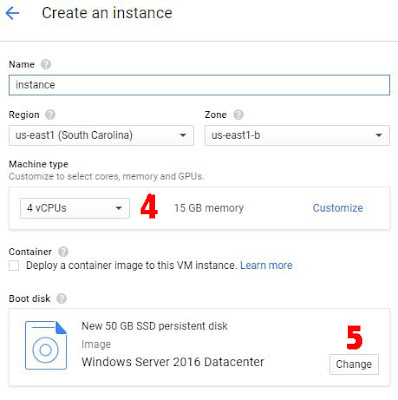
- Lalu pilih Create Instance, dan pilih spek yang sobat inginkan
- Machine type pilih : 4vCPUs
- Boot disk pilih : New 50 GB SSD peristent disk [Windows Server 2016 datacenter]
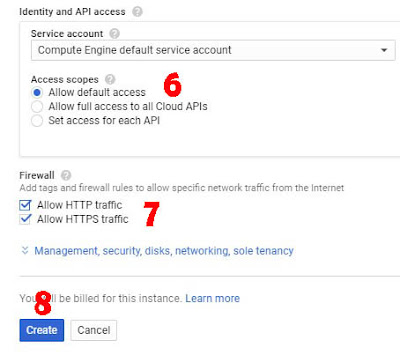
- Access scopes pilih : Allow default access
- Firewall ceklist semua [Allow HTTP dan HTTPS traffic]
- Setelah itu Klik Create
Jika sudah jadi, hasilnya seperti ini
Yang perlu sobat lakukan :
- Pada pilihan RDP pilih Set Windows password
- Ganti dan Copy Password [simpan password]
- Terakhir Copy IP VPS [simpan IP VPS]
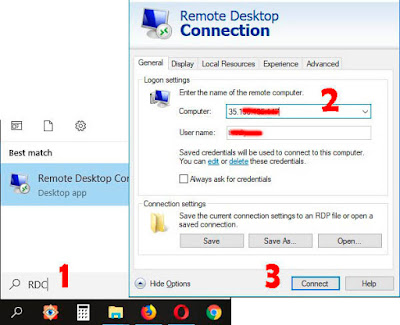
#Tahap Ketiga : Menghubungkan VPS dengan Remote Dekstop Connection [RDP]
- Buka Remote Dekstop Connection di Laptop/komputer sobat
- Masukan IP VPS
- Klik Connect
- Masukan Password
- Klik OK
- Jika ada peringatan "The identity of the remote computer cannot be verified. Do you want to connect anyway ?" klik Yes
- Selesai
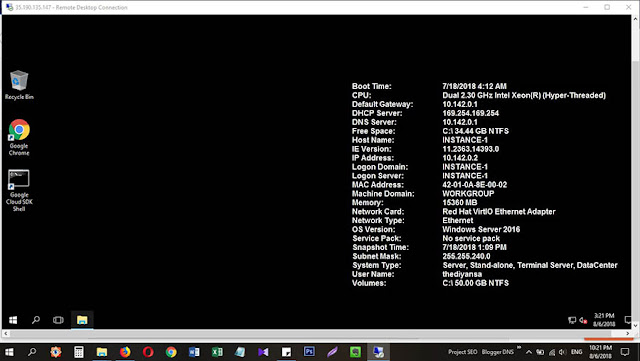
VPS sudah bisa sobat gunakan. Tinggal download dan instal aplikasi yang sobat butuhkan seperti Mozilla, Chrome, Opera dll.
Seperti ini tampilan VPS Windows dari Google Cloud
Demikian Cara Membuat VPS Windows di Google Cloud. Semoga bermanfaat ya sob.. [www.abulandok41.com]



0 Response to "Cara Membuat VPS Windows di Google Cloud"
Post a Comment